Install the Dimension Icon SPM Unit
- Move the acoustic hood/vibration isolation table to the desired location.
- Using a pallet jack (maximum fork spacing 28”/71 cm, maximum fork thickness 3.5”/9 cm), move the crate containing the Dimension Icon microscope to the front of the acoustic hood.
- Remove the red air and vacuum plugs, shown below, from the back of the Dimension Icon microscope:
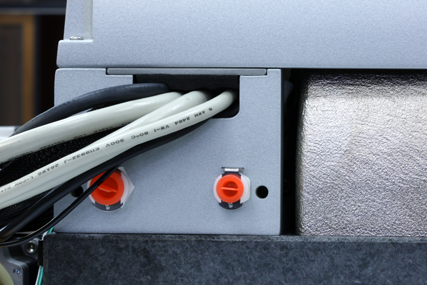
- Uncoil and unwrap the cables and hoses.
- Attach the air and vacuum hoses to appropriate fittings on the back of the Dimension Icon microscope.
- Place the vibration isolation pad on the isolation table.
- Slide the Dimension Icon microscope to the vibration isolation table.
NOTE: The distance from the left and front edges should equal 7” and 1” respectively.
CAUTION: The Dimension Icon microscope unit exceeds the two-person lift weight limit and should be lifted with a mechanical assist. Use proper lifting technique when removing or replacing the Dimension Icon microscope. Improper lifting may cause muscle strain or back injury.
CAUTION: Do not place your fingers under the Dimension Icon granite base when moving the microscope. They can get crushed when the granite base settles on the vibration isolation pad.
- Carefully remove the plastic wrap from the stage.
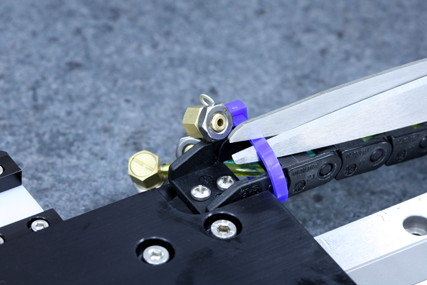
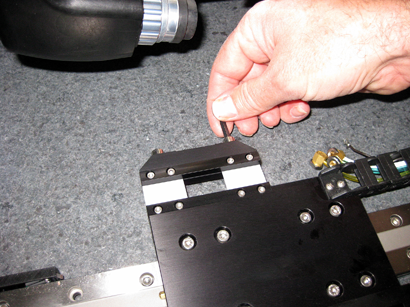
- Cut the zip-tie holding the air hose and barbs to the X-axis stage:
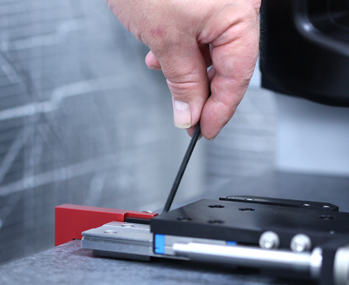
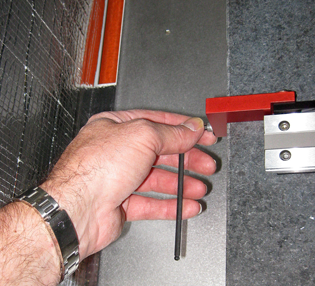
- Using an allen wrench, remove the red shipping bracket securing the X-axis linear bearing to the granite base:
- Wipe down the granite base with isopropyl alcohol.
- Remove two #10 cap screws from the back of the XY flexure:
- Attach the chuck base to the X-axis flexure using the same cap screws.
- Attach the right angle barbs to the chuck base.
NOTE: A nut is attached to each barb to retain the o-ring. Remove the nuts before attaching the barbs.
- Connect the color-coded vacuum and air hoses to the chuck base.
- Attach the sample bias wire to the chuck base.
| www.bruker.com
|
Bruker Corporation |
| www.brukerafmprobes.com
|
112 Robin Hill Rd. |
| nanoscaleworld.bruker-axs.com/nanoscaleworld/
|
Santa Barbara, CA 93117 |
| |
|
| |
Customer Support: (800) 873-9750 |
| |
Copyright 2010, 2011. All Rights Reserved. |
Open topic with navigation